Over the years, as a sex toy reviewer; I’ve accumulated a collection of toys, lubes and goodness knows what else – and I’m not one to just ‘throw’ stuff away. Products that don’t enter our regular rotation have ended up in the sex toy graveyard (aka the attic); just in case I ever need to refer to them again.
One afternoon, after taking a trip into the attic to look for something else; I stumbled on our stash of hidden sex toys and decided to take a stroll down memory lane. So many things that I had completely forgotten about. As I rummaged around one of the boxes, pulling out the many a forgotten butt plug, I pulled out a very old clone-a-willy kit. We’ve never actually reviewed one of the blog before but we have used them… with varying results. The biggest problem with these kits, is that it requires a LOT to happen in a very short space of time – and the results we’ve got from these its has been questionable at best and just down right dangerous at the worst.
I follow a lot of dildo makers on Twitter, and I’m always in awe at all the wonderful creations they come up; I’ve often thought how fun it would be to design my own dildo… and then it hit me. Literally at first, because I knocked something off the side in my ‘eureka’ moment and it hit me straight in the face. But I had a revelation; a few years ago I bought my husband a 3D printer for Christmas; for months I lost him to his study as he tinkered with it, and printed all sorts of weird and wonderful things. Could I design a dildo that he could 3D print for me? And then could I cast it using this old kit? I wanted to see if your average Joe consumer at home could design and make their own dildo ‘on the cheap’ using only materials that are readily and easily available. And thus our dildo-making journey began.
But wait a minute… Not everyone has a 3D printer?!
OK, alright – you’ve got me on that one. It’s true, not everyone has a 3D printer. BUT; more people have access to them than you might think – and the prices of a basic plastic filament printer have come down a lot over the years – especially as people begin to favour resin printers. The printer we have is the Creality Ender 3 Pro – it retails for around £208 on Amazon (as of publication), with the basic model going for about £184. They are a bit of a learning curve; so don’t expect to be printing dildos straight out of the box; but if you have the time and inclination to learn about 3D printing, it can be very rewarding.
Although 3D printing isn’t the only way you can custom make a dildo; You could use clay to sculpt and shape your design; This will actually be the next step I want to take; if you are interested in this becoming an ongoing series – you’ll have to let me know on Twitter or drop me an email if you want to see more. But as I had someone on the house that has easy access to a 3D printer, this was the method that I’ve started with.
OK fine, but David… you’re not very creative. How can you design a dildo?
Well that’s a bit harsh, but a fair point. It’s true, I’m not very technical or creative. So at this point, I didn’t know where to begin. From what I could understand through googling, I would need to use some sort of CAD (computer aided design) program in order to produce the 3D model. Already I was feeling a little over-whelmed, especially as there are SO MANY programs to choose from. I searched using the terms ‘beginners’ and ‘easy’ and ‘free’… and even then, the programs I tried… I just couldn’t get my head around them. At all. I thought to myself, there HAS to be an easy way… something that’s really simple and easy to understand… so I popped in the words ‘design a dildo’ into a google and hit ‘search’.
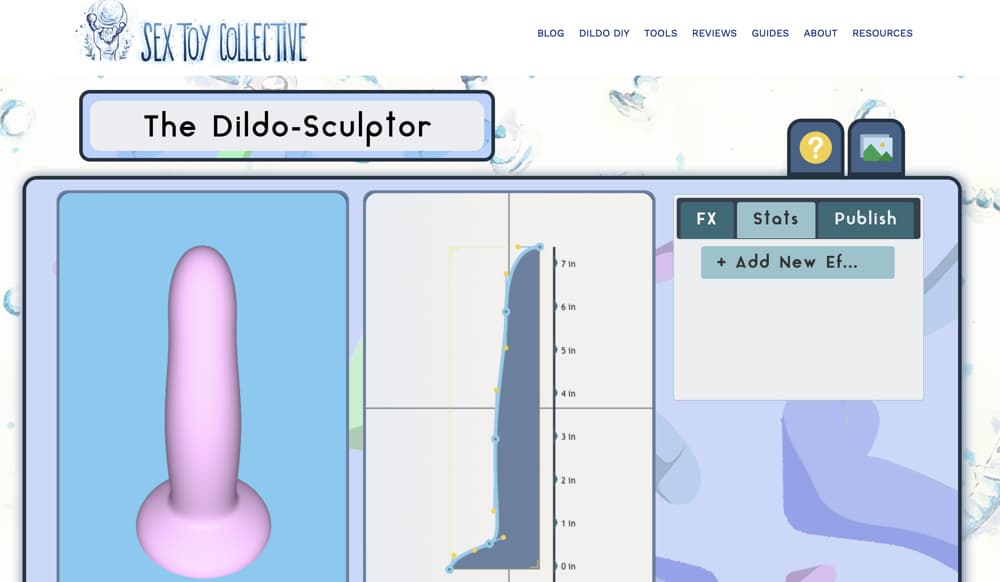
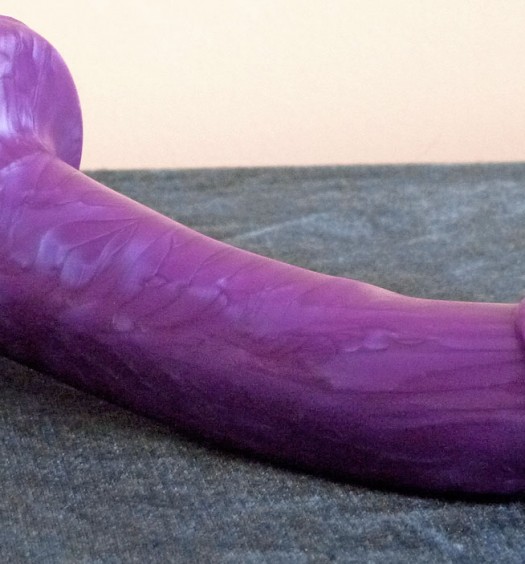
The first thing to catch my eye was the Dildo Sculptor from the Sex Toy Collective. This simple interface provides you with a very basic dildo shape; and then there are various sliders and things that you can turn on/off in order to craft a dildo of your own design. You can give it a curve, you can add twists and lumps and bumps and waves. There is a 360 degree view available, allowing you can see what it will look like from all angles. You can also customers the girth and length. I was aiming to keep mine relatively ‘realistic’ sized, as the silicone will be using is quite firm.
After spending a good 20-30 mins just playing around with all the different settings – I had a simple design that I was happy with. The tool even gives you a rough estimate as to how much silicone you’ll need to use and it’s dimensions. As a tool, it’s quite basic but it seems to work really well, and for someone with no prior technical knowledge, such as myself – it was surprisingly intuitive and easy to use. You are still limited with what you can do, and as we’re going to be 3D printing, I didn’t want to go to ‘crazy’ with the design. Once you are done, the website then outputs your design into an .STL file (which is what you need for 3D printing). All I had to do was email that to my husband and ask him very nicely if we could print it for me.


The Test Print
Once I had emailed the file over, I hastily ran upstairs to ask him if he could check his emails and put something on to print. He opened the .STL file with his printing program and we immediately had a problem. It was tiny! I don’t know if there was a discrepancy with the file or if the dimensions just got screwed up, but I had to get him to tinker with the file to get it to print at the correct size that I needed. Once he’d figured it out, he spotted there are some areas that may not print properly – because of the shape, it would need additional supports in order to print correctly.
To ascertain how much of a problem this might be, we set up a very quick one-layer pass test print – to check for the dimensions and to also make sure it would print. To our surprise, the test actually turned out OK. It did highlight the areas that would need additional support but with some adjustments – we knew we could get it to print properly. The perks of having a geeky husband pay off sometimes, you know.


At this point, I was very excited for the prospect of what was to come. I was holding a dildo in my hand that just a couple of hours ago, was just an image on a screen. The length was perfect, the girth was perfect. The curve – beautiful. This is my kind of dildo. Now I just had to wait until the next day for the final version of the dildo to be printed. It was going to be a long night.
It’s time to prime…
Awakening early the next day, I raced downstairs to see if our dildo had printed. Oh my god, it had and it was perfect. Solid, sturdy, no holes… it was a thing of beauty. I was eager to get it moulded as soon as possible; but there was something we needed to take care of first. The only ‘downside’ to a filament printer, is that the finished prints often have print lines – this is understandable given that the printer basically prints your object one line at a time. If I was to cast a mould using it as it was – it would have lots of texture and lines that I don’t want in the finished product.


So the first job is to sand the dildo down, to remove some of the print lines. This won’t give us a completely smooth finish, but it prepares it for the next step which is filling and priming. After giving the dildo the worst hand-job ever, it was time to coat it with some primer and filler spray. This basically fills in any little gaps and will give us a smoother, less textured finish. It would require a little more sanding after it’s had it’s spray; but the finished and primed dildo was already looking pretty good. In fact, it didn’t even look like it had been printed. It was definitely hard work, but I now have a dildo that I can mould over and over again.


It’s Mouldin’ Time
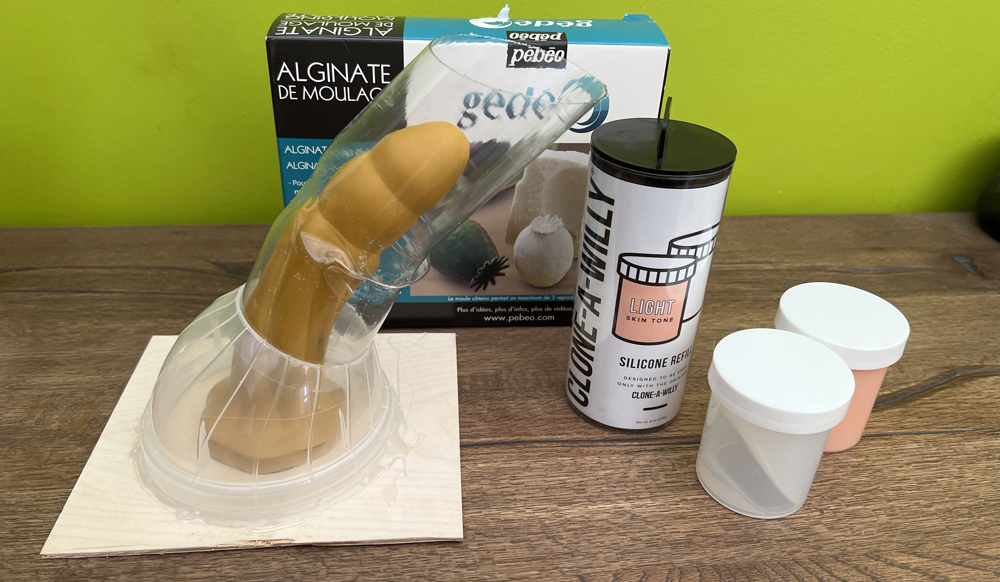
We’re at the point where we can now make our mould using the clone-a-willy kit. The mould is made using alginate; a seaweed based powder that’s often used for life-casting. I have issues with alginate, especially for the purpose of cloning a living, twitching cock. The kits require you to work fast – as the alginate sets within a minute of it being mixed. When you are casting a live penis – this is where most of these moulds tend to fail – because you either didn’t get your dick in the bowl quick enough, or you didn’t stay hard or whatever… there’s so much going on, and it’s such an unsexy process.
But I have to admit, I was hopeful that we’d get a somewhat decent result as we’re not having to worry about our cock going flaccid or whatever. So we mixed our alginate, and realised that actually, we didn’t have enough mix – we hadn’t taken into account the volume of mix needed for our container so we were a little short. Thankfully, I did have a second clone kit available (one that was left over from when I bought kits to make cocks on holiday… don’t ask). So we set out cock into the mould and then was able to pour a second batch of mix around it and luckily, it all set together and we got our mould.


If you look in the photos, you can see the very clear line between the different batches of alginate (and for some reason the second batch was a lot ‘bubblier’ than the first. As per the instructions in the kit, we let the mould sit for a few hours and then emptied any collected water before we began to mix the silicone.
Fresh is Best
Grabbing an empty disposable cup to mix my silicone in, I was unsure if this was going to work. The kit has to be at least 5/6 years old now… not even sure if the silicone is going to be OK. After pouring it into the cup to mix, I noted it was extremely tough to mix. But we did our best, poured it into the mould and all we could do now was wait 24 hours for the silicone to (hopefully) cure). A little tip I learned was to keep hold of any silicone that hasn’t been poured in the pot you mixed it with – because you can use this as a guide to tell you if your main sculpt has cured.
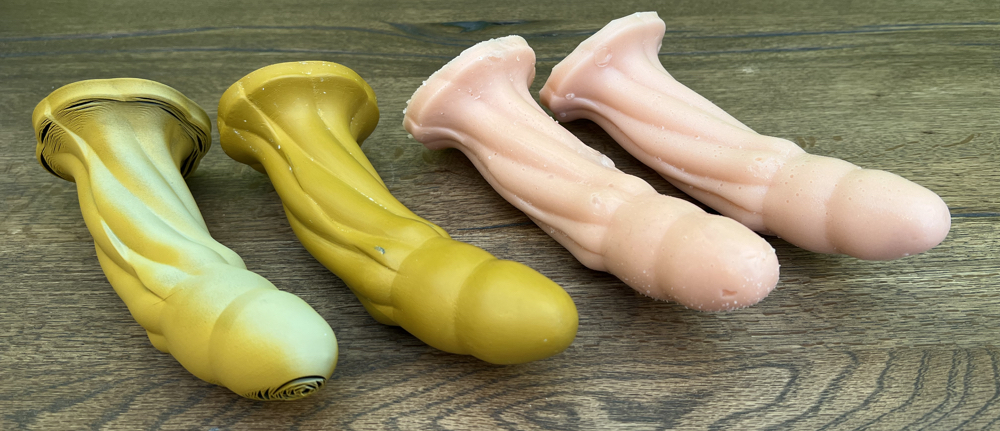
After a long wait, it was time to un-mould. I was anxious. Nervous. Excited… I was hopeful that this was going to have worked. It was time to reveal. With a little bit of coaxing, my brand spanking new dildo popped out and… oh it was awful. The worst cast I’ve ever seen. There has been so many air bubbles in the alginate that the entire surface of the dildo was covered in tiny little bumps. It also become obvious that the silicone either wasn’t mixed properly (or had gone ‘bad’) because there were pockets of uncured silicone in the base and in the shaft – hollow cavity’s filled with sticky liquid. But texture and uncured silicone aside – the general shape had turned out really well. But as a dildo… it was not usable. And this just compounds why these kits are, generally, a waste of time.


Sure the activity can be fun and very messy; if you’re using these kits to try and make a viable copy of your partners penis for play purposes; I think you’ll be sorely disappointed. Even if the silicone had cured properly; there are still little holes and bumps all over the surface that would make it unsuitable for internal use. If you just want to display it for a giggle in the bedroom; go ahead – but as an actual sex toy… no. I’m not going to stop there though. I was determined to get a functioning dildo. I just needed to take a little more time (and get some fresher silicone).
Take Two…
So the first thing I needed to do, was order some more silicone. Still wanting to stick with the idea of using items that are easily accessible; I grabbed a couple of these silicone refill kits from Lovehoney. I also took a trip down to Hobbycraft to pick up some fresh alginate. This time, we were going to work with cooler water, to gives us a few more minutes of mixing and pouring time. My hope was that because we had a little more time to work this way, we’d be able to get the alginate mixed with less air bubbles. Or so I thought. We also decided to craft a different container to make the mould in; utilising the tubes from the clone-a-willy kits.
We glued the dildo down onto a board and hot glued our ‘mould’ over it. To be fair, I thought it looked quite clever; with the idea being that were would pour our alginate mixture in and it would mean we got a lovely even flat base, and the also ensure that the dildo didn’t touch the sides and give us a wonky cast.
Our second attempt at mould-making went… well, worse than the first attempt. The first batch of alginate set before we’d even really had a chance to do anything. I don’t know what went wrong but it was set before we’d even put the dildo in. So we started again, mixing up the last bit of alginate we had. Success! We were able to pour it into our mould and it was looking good. For all of about 10 seconds. Because disaster struck. The dildo became unstuck from the base, and began to float. By this time, the alginate was set and we had an impression that was unusable. Oh the frustration!
Third Times the Charm
Undeterred, I knew I was going to try this again – but alas, we were struck with a heat-wave and the last thing I wanted to be doing was fannying around, trying to make a mould – especially as the ambient temperature of the house would most likely had sped up the setting time of the alginate – something we were already having an issue with. So we had to put our dildo-making attempts on hold until it was a little cooler. So we purchased MORE alginate (which we found much cheaper on Amazon) and waited for the temperature to cool a little.
This past weekend, we finally had a chance to give it another go. This time, we just made a simple mould enclosure using clear acetate sheets and some hot glue (and prayer) – we made our alginate, got out dildo in and got a good impression first time round. Of course. when I say good, I don’t mean perfect because there were definitely still air bubbles present, which I knew would come out in the final product one the silicone was poured. But it didn’t look as bad as the first time – so I was still hopeful.


A few hours of drying before mixing the silicone; which definitely mixed and poured A LOT better this time. We used about 1 and a half of these refills in order to fully cast the dildo. Once poured, it was going to be another 24 hours before we’d find out if we had been successful. The countdown had begun.


The Unveiling…
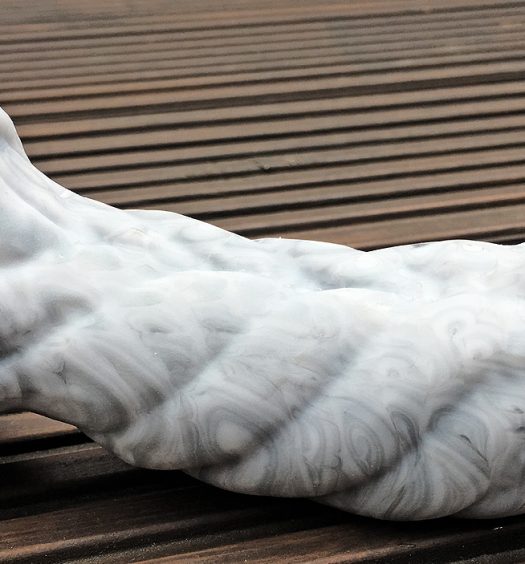
And so, you are now wondering how we did. I went outside to the workshop and checked to ensure that everything had cured. With great care, I began to work the dildo out of the mould. With a gentle ‘plop’, it popped out. Had it worked? Well… yes and no.
Yes, it was fully and properly cured this time – which is great. It also had the flat base, allowing this one to actually stand up by itself. The silicone had thoroughly mixed this time, and there were no hollow patches or stickiness. Success! However, another problem with these home-made kits, is that you are unlikely to get a pour that doesn’t have air bubbles in. Luckily on this version; the extra lumps and bumps from air holes in the alginate were much less than before. But now the surface or the silicone has lots of air bubbles just under the surface. Most of them are covered by a little thin layer of silicone – but still far too many for me to consider using this internally. At least, not without using a condom over the top to be safe. But compared to our first pour – it turned out much better.


So what did we learn?
Can you design and cast your own dildo at home relatively easily? Well the designing part was incredibly easy; and a lot of fun to do. The casting however; yeah that was the struggle – and the results we got just aren’t worth it. Sure, it was fun to do – but I’m still sat here without a dildo I can actually use. The reality of these home ‘clone’ kits is that they just produce inferior (and unsafe) results. But I will not stop until I have fucked myself with a dildo that I designed and made. So the next step for me will to look into purchasing stuff to make a silicone mould and a vacuum chamber to allow me to get rid of air bubbles. Would you be interested in a follow up post about this? I also want to have a go at sculpting my own designs with clay as well… who knows where this could end up?
If you’ve enjoyed this post and want to help support the blog (and potentially help us fund this future endeavour) – please share this post; and if you plan to make any sexy purchases – please consider clicking on any of the banners around the site – your purchases through our affiliate links help us keep the blog alive (and helps me do fun stuff like this).
Until the next time…
You Might Also Like


Connect